
Table Of Contents
Requesting Access
To request access to edit this website please go to NAMS and request account for ARCSOS Content Editor
Logging In
Development (practice site)
Use this link – https://arcsos-dev.arc.nasa.gov/login – to login to the dashboard using your NASA PIV badge and/or Launchpad credentials. Go here to practice creating posts that will only be visible inside the Ames firewall.
Production (public facing site)
Use this link – https://arcsos.arc.nasa.gov/login – to login to the dashboard using your NASA PIV badge and/or Launchpad credentials. Published posts in the production can be viewed by the public.P
WordPress Dashboard
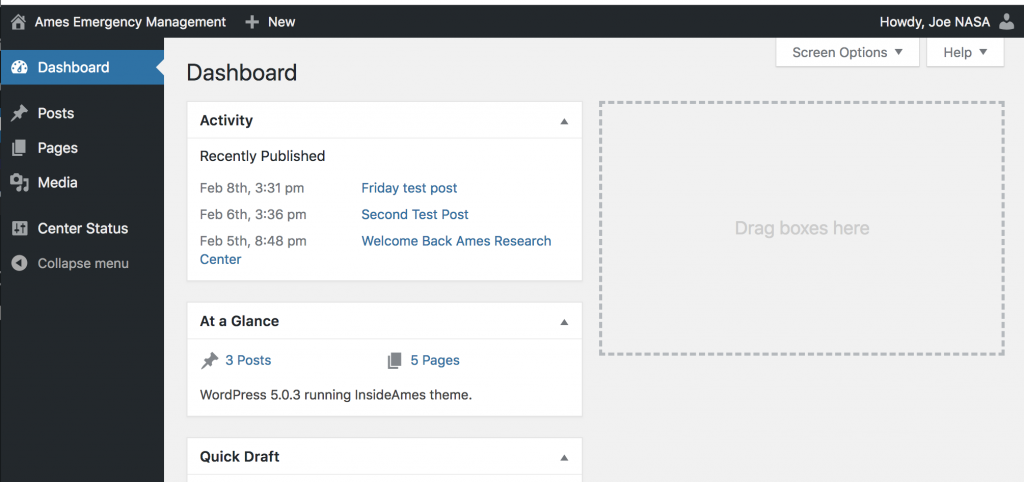
After logging in you will be taken to WordPress Dashboard where you can find existing news posts, documents, or pages, as well as add new content.
Content Editor admin screen
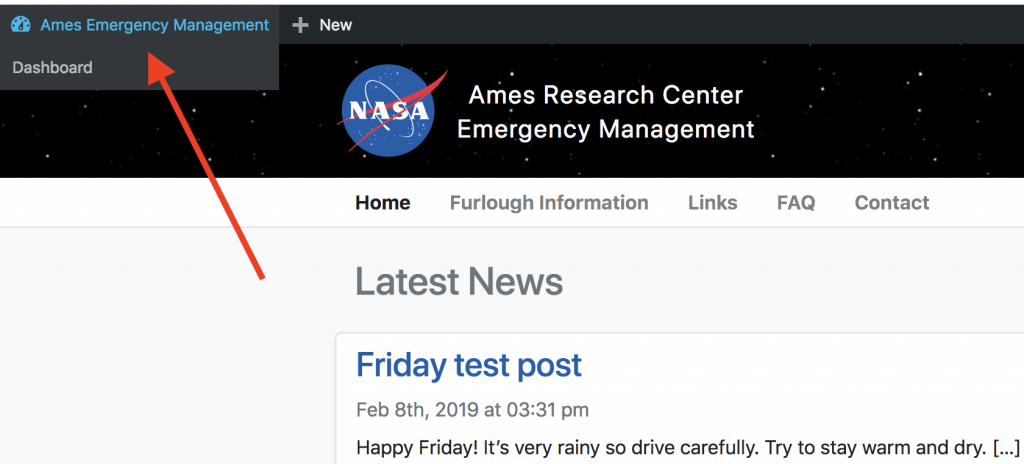
You can return to the dashboard at anytime when loggged in and viewing the website by clicking the menu in upper left corner as seen in image below.
Return to dashboard/admin area
Content Types Overview
The most common content type is a Post, these are the stories that show up on the front page under “Latest News“. Generally only a summary of the post will appear on the front page, but clicking on the title will take the user to the full version. Posts will move down over time and eventually off the front page as newer ones are added, but can still be navigated to, searched for, and viewed unless the are deleted or unpublished. More information on how to add/edit Posts will be shown below.
Pages are used to present information such as links and documents related to a specific subject. A page is generally linked to from the main navigation menu, examples for this site include, “Furlough Information”, “FAQ”, and “Contact Page”. In general you won’t be creating pages, but possibly adding to or updating content on existing pages if needed. More information on how to add/edit Pages will be shown below.
The Media library contains all uploaded documents and images that can be used throughout the site or linked to directly from within a post or page. More information on how to add/edit Media will be shown below.
Posts
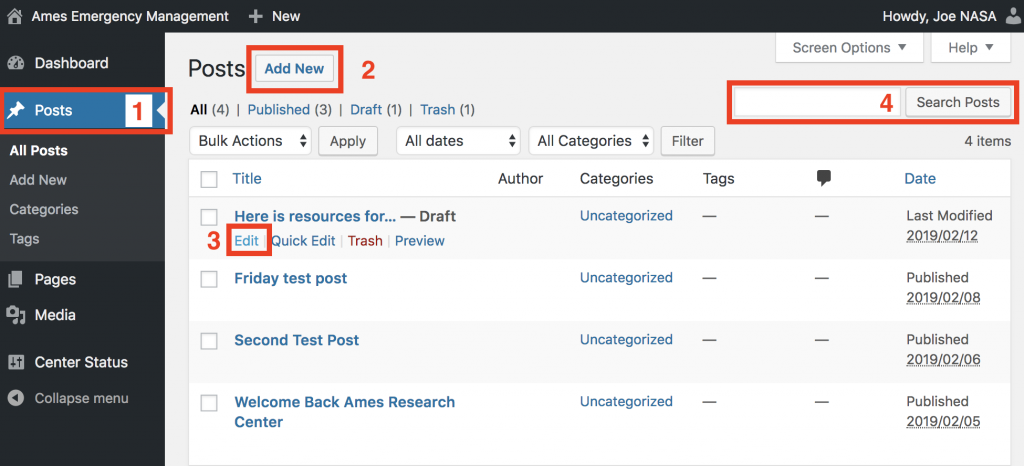
Posts can be added or edited using the “Posts” menu in left had sidebar of the dashboard as seen in the higlighted (area #1) in the screenshot below. Use the “Add New” button (area #2) to create a new post, or search for an existing post by using the search feature (area #4). Click “Edit” when hovering over your desired post (area #3) to open an existing post for editing.
Functions to manage posts
After the new (or existing) post is opened for editing, you will see something similar to the screen below. The first block (outlined in blue) will be the title of your post.
Add / Update Post Title

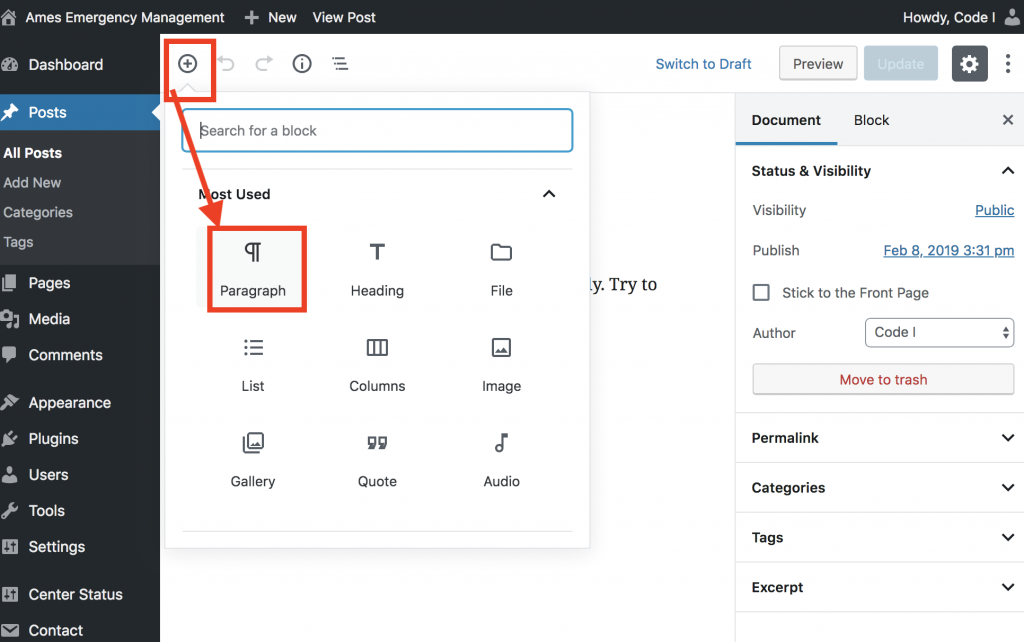
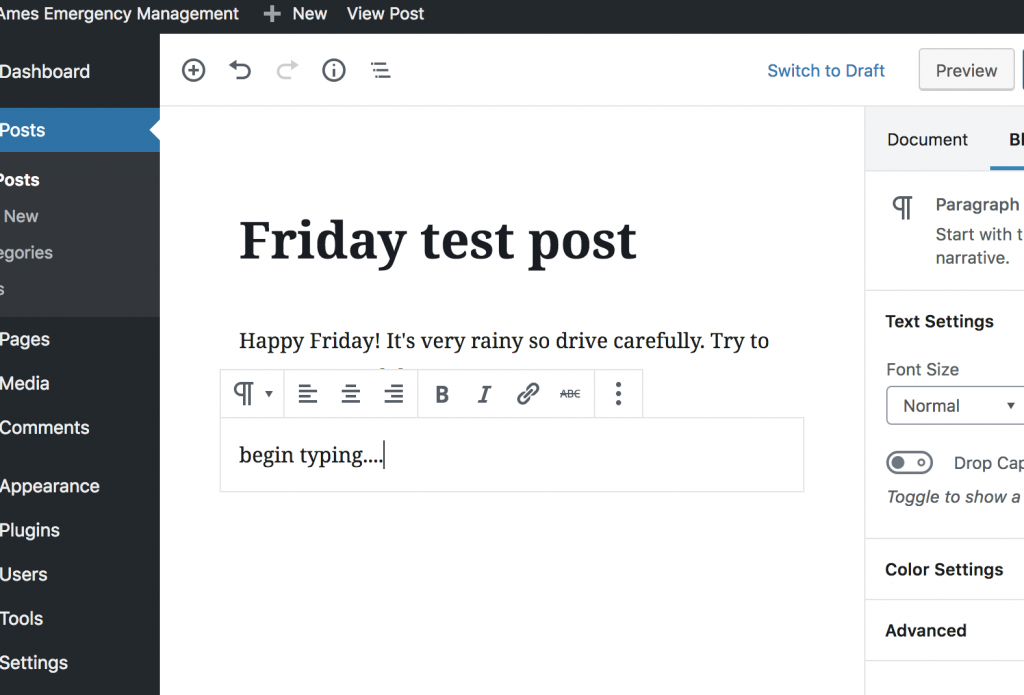
After entering your title, you can begin to add “blocks” of texts to your post. To do this, use the plus (+) symbol in the upper left corner above the post editing section, as seen below. You will most likely want to choose the “Paragraph” type block to add a new block of text.
Block of Text
Once the new block is added, you can begin typing in it, or you can paste in copied text from another source (email, word doc) directly into it. Pasting content will automatically create new paragraph blocks for each paragraph in your copied text, hitting the return key after the end of a paragraph will also generate a new paragraph block below it.
Type or Copy / Paste
If you wish to remove a block of text or other object, click inside the block, this will present a menu (3 dots) in the upper right, clicking that will popup more options, including option to remove the block from the post (or page).
Remove Block

Pages
Editing pages is almost identical to posts, so all of the above instructions for posts apply to pages. With pages, you may want to add more advanced elements, such as lists, columns, images, documents, or even tables.
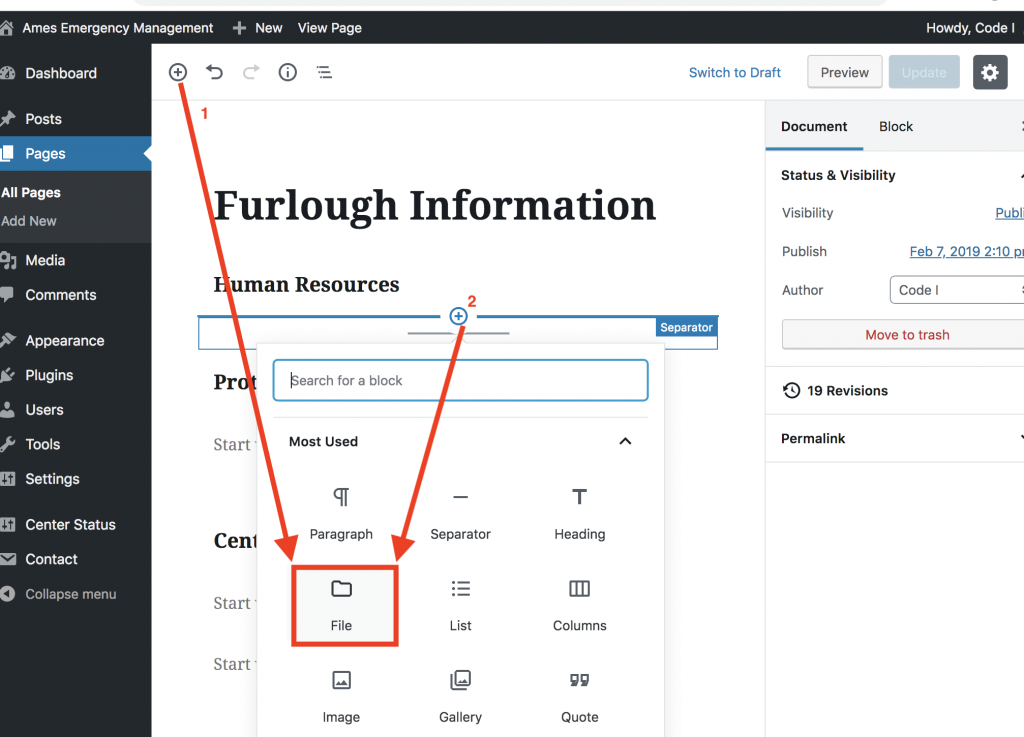
Here we will describe how to add a document to a page, so users can download it. To add a document to a page, use the (+) add block menu and select “File” option. This can be done through the menu at the top of the page, #1 in screenshot below, which will add the block/file to the end of the current content, or you can hover over an existing block which will allow you to add the new file at a specific place in a page, #2 in screenshot. These blocks can be reordered later on if needed.
Add new File Block
Media
some instructions for adding/editing media..